
Step 1: Open the Waves Client
Step 2: Enter your wallet seed/password and click "Log in"

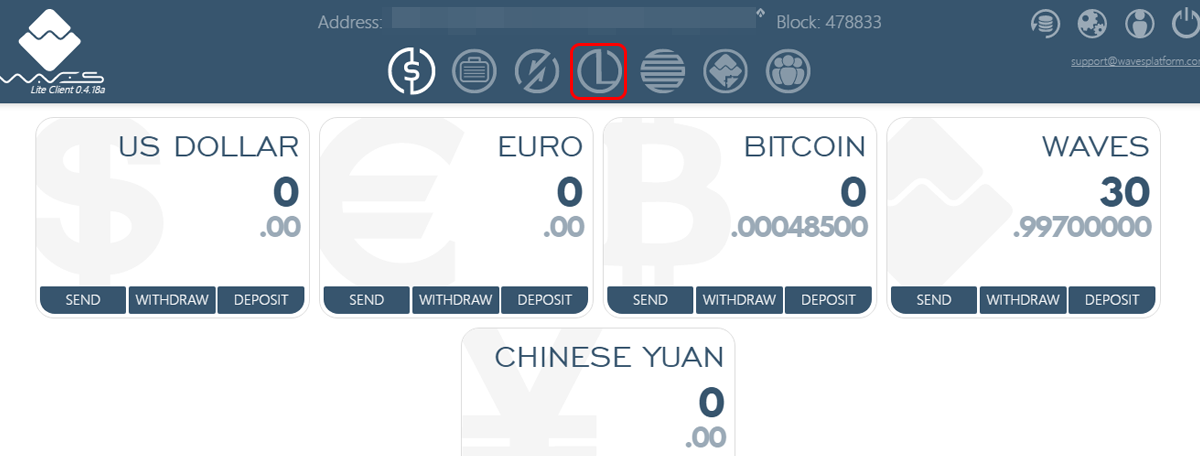
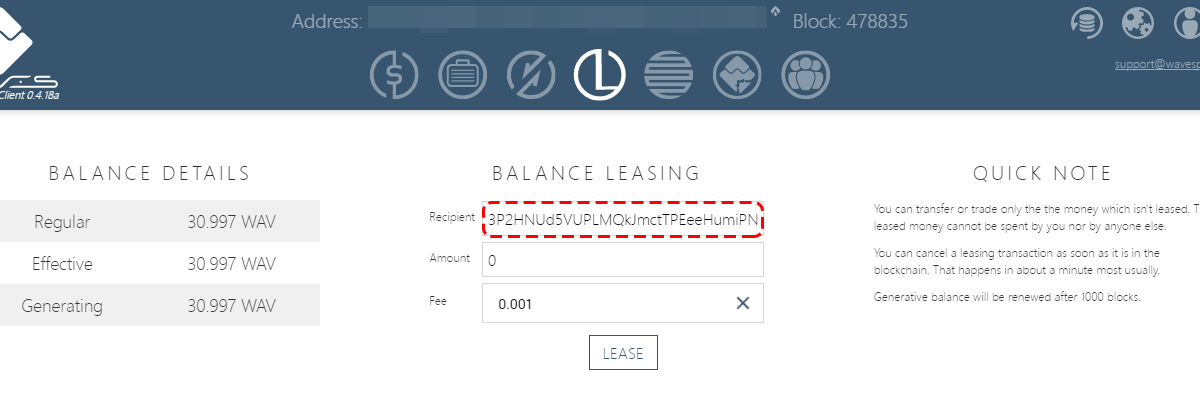
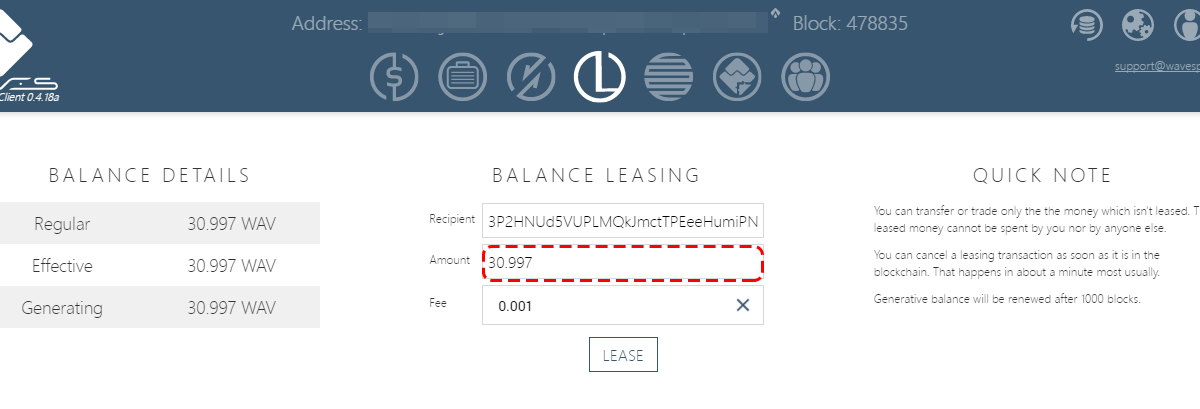
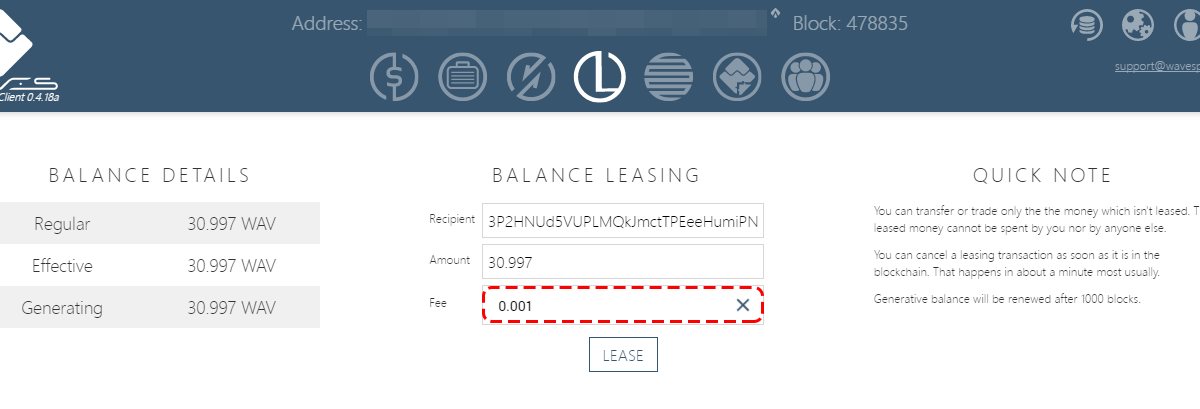
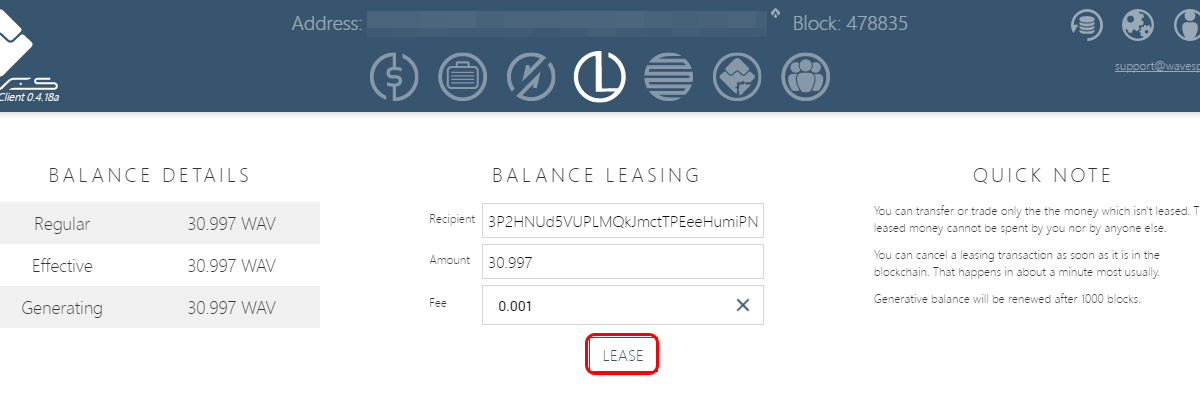
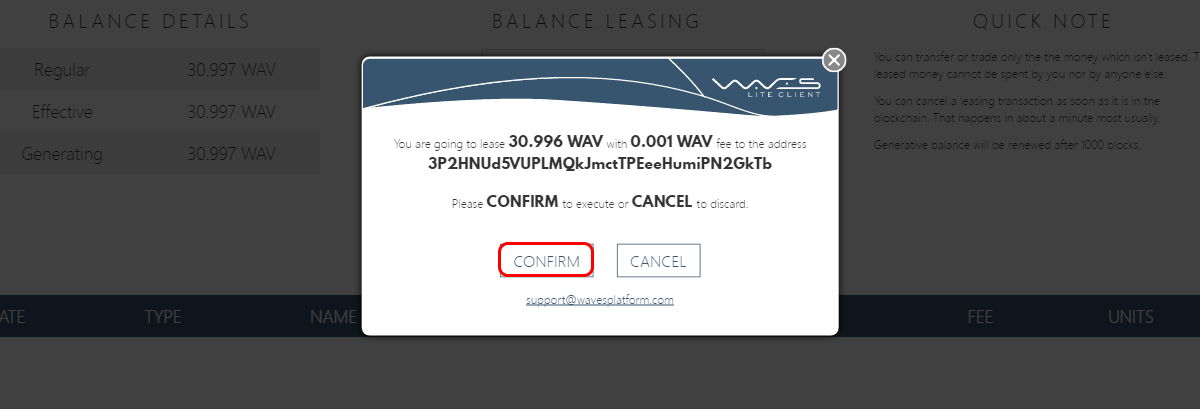

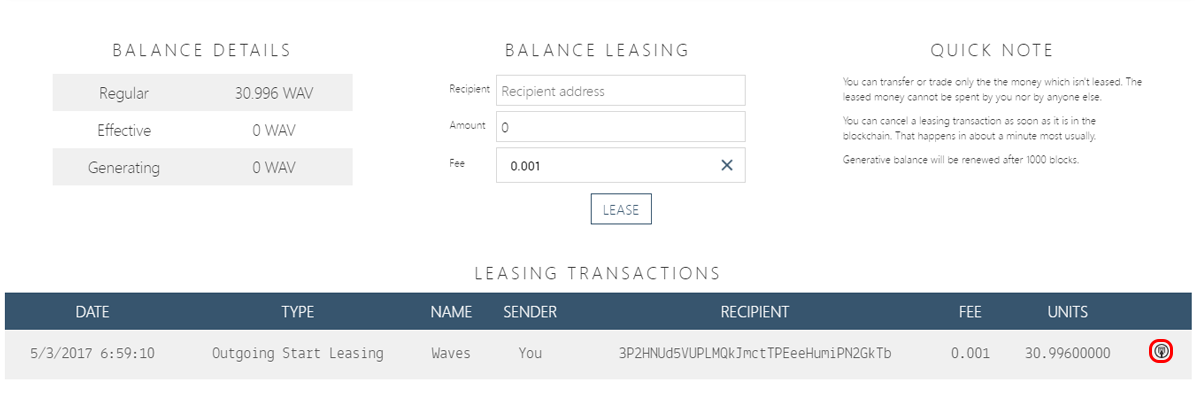
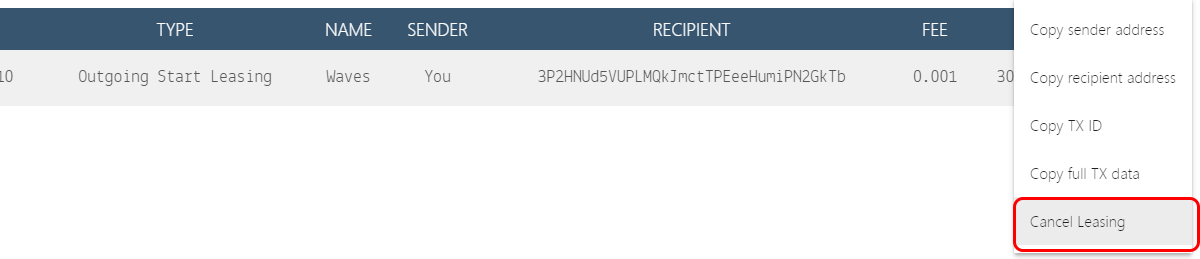
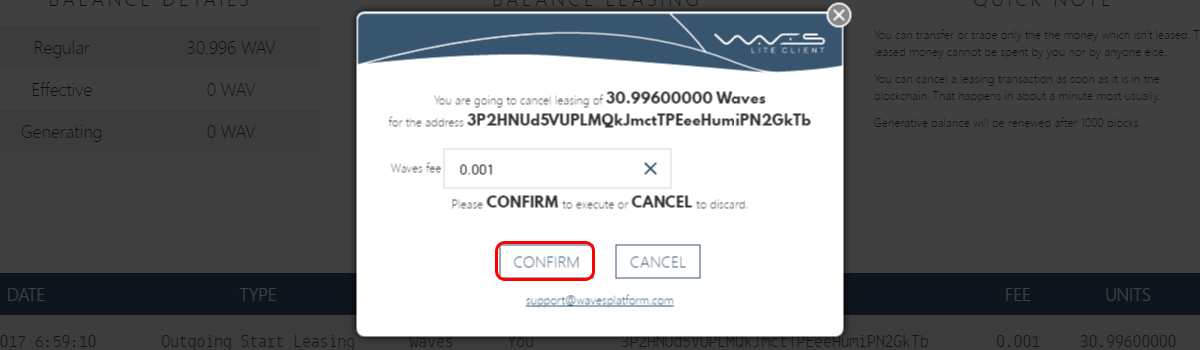
You can see the transaction by scrolling down

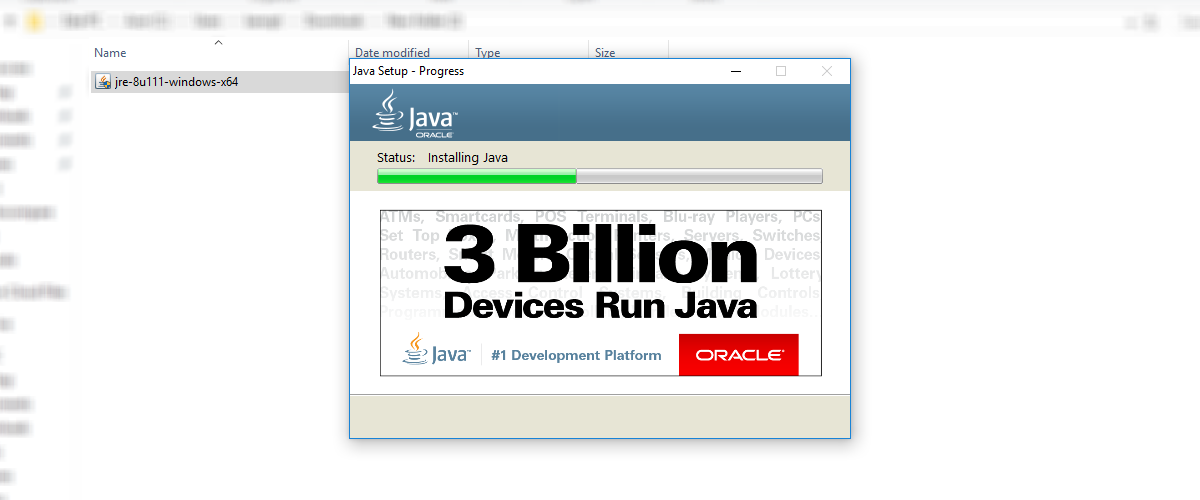
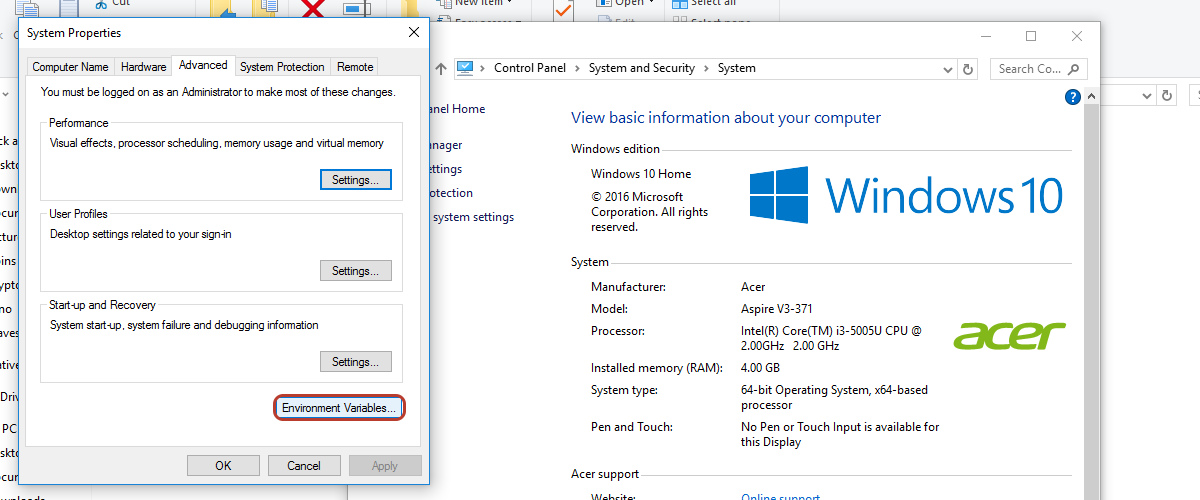
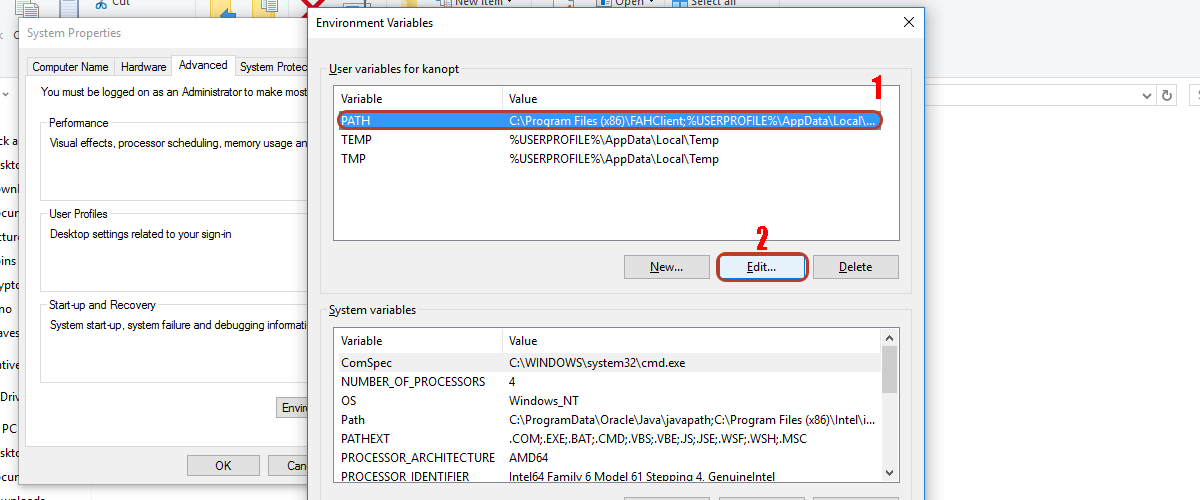
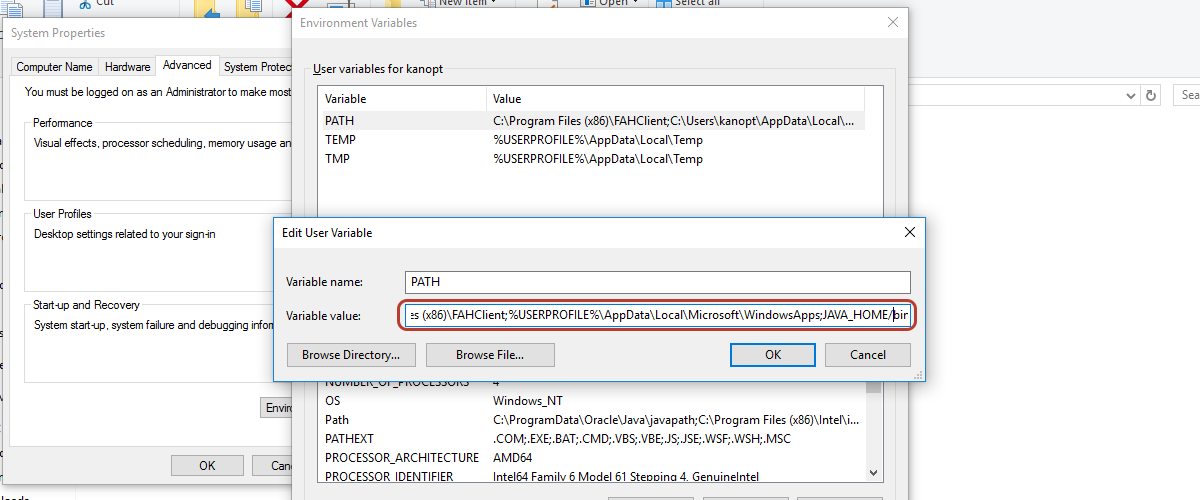
The first thing we need to do is to install JRE 1.8 in order for Waves to function properly.

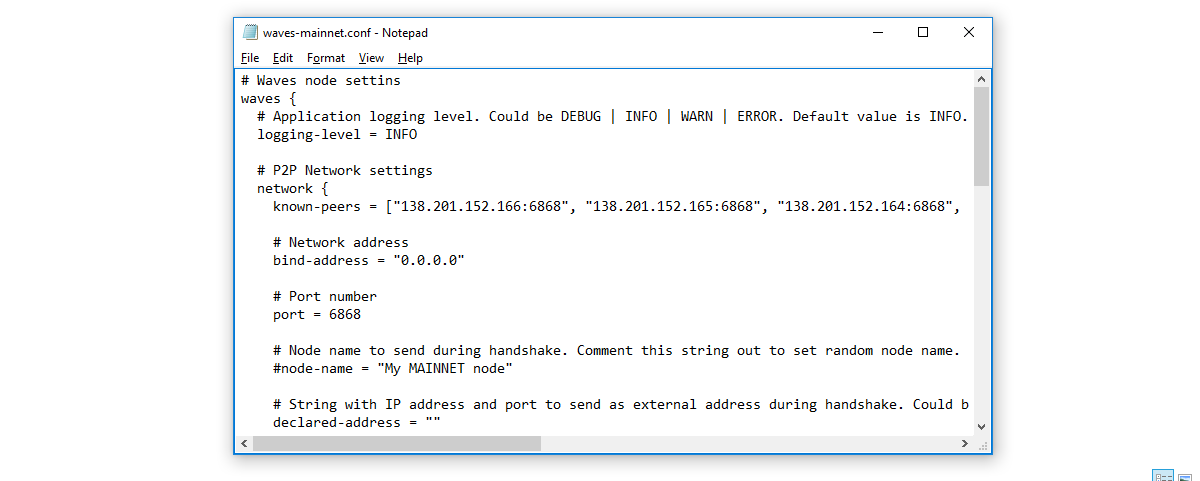
# Waves Node settings section.
waves {
# Node base directory.
directory = ${user.home}"/waves"
# Application logging level. Could be DEBUG | INFO | WARN | ERROR. The default value is INFO.
logging-level = INFO
# P2P Network settings.
network {
# Peers and blacklist storage file.
file = ${waves.directory}"/data/peers.dat"
# Network address.
bind-address = "0.0.0.0"
# Port number.
port = 6863
# Node name to send during a handshake. Comment this string out to set random node name.
#node-name = "some-node-name"
# String with IP address and port to send as an external address during a handshake. Could be set automatically in case of UPnP is enabled.
declared-address = ""
# A nonce to send during a handshake. Should be different if few nodes run on the same external IP address. Comment this out to set random nonce.
#nonce = 0
# List of IP addresses of well-known nodes.
known-peers = ["52.30.47.67:6863", "52.28.66.217:6863", "52.77.111.219:6863", "52.51.92.182:6863"]
# Restricts node communication to local machine.
local-only = no
# How long the information about peer stays in the database after the last communication with it.
peers-data-residence-time = 1d
# For how long a peer stays in the blacklist after getting in it.
black-list-residence-time = 10m
# A number of network connections handled simultaneously.
max-connections = 30
# Timeout on network communications with peers.
connection-timeout = 30s
# Network buffer size.
outbound-buffer-size = 16M
# The minimal ephemeral port number used to distinguish incoming connections.
min-ephemeral-port-number = 35368
# The size of a circular buffer to store unverified peers.
max-unverified-peers = 1000
# The period of time between broadcasts of the connected peers' list.
peers-broadcast-interval = 2m
# The number of incorrect packets received from a peer to blacklist it.
black-list-threshold = 50
# The number of unrequested packets received from a peer to blacklist the peer.
unrequested-packets-threshold = 100
# UPnP settings.
upnp {
# Enable or disable UPnP tunnel creation. Use this setting only if your router/gateway supports it. This is useful only if your node is running in a home network. And completely unuseful if your node is in the cloud.
enable = no
# UPnP timeouts.
gateway-timeout = 7s
discover-timeout = 3s
}
}
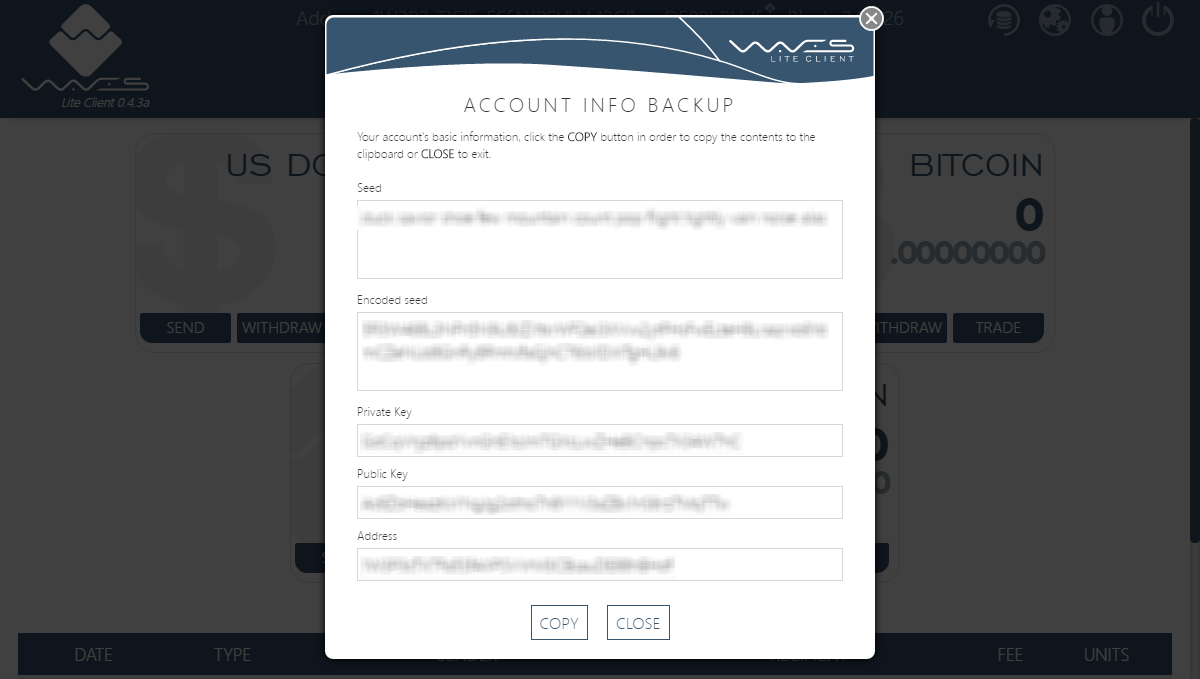
# Wallet settings.
wallet {
# The path to wallet file.
file = ${waves.directory}"/wallet/wallet.dat"
# Password to protect wallet file.
password = "some string as password"
# Wallet seed as a BASE58 string.
seed = ""
}
# Blockchain settings.
blockchain {
# The path to blockchain file.
file = ${waves.directory}"/data/blockchain.dat"
# Blockchain type. Could be TESTNET | MAINNET | CUSTOM. The default value is TESTNET.
type = TESTNET
# The 'custom' section should be uncommented and set only in case of CUSTOM blockchain type is selected. It's impossible to overwrite predefined 'testnet' and 'mainnet' configurations.
# # Address feature character. Used to prevent mixin up addresses from different networks.
# address-scheme-character = "C"
#
# # Timestamps/heights of activation/deactivation of different funcions.
# functionality {
# allow-temporary-negative-until = 0
# allow-invalid-payment-transactions-by-timestamp = 0
# require-sorted-transactions-after = 0
# generation-balance-depth-from-50-to-1000-after-height = 0
# minimal-generating-balance-after = 0
# allow-transactions-from-future-until = 0
# allow-unissued-assets-until = 0
# allow-burn-transaction-after = 0
# require-payment-unique-id-after = 0
# allow-exchange-transaction-after: 0
# allow-createalias-transaction-after: 0
# }
#
# # List of genesis transactions
# genesis {
# # Timestamp of genesis block and transactions in it
# timestamp = 1460678400000
#
# # Genesis block signature
# signature = "BASE58BLOCKSIGNATURE"
#
# # Initial balance in smallest units
# initial-balance = 100000000000000
#
# # Initial base target
# initial-base-target =153722867
# # Average delay between blocks
# average-block-delay = 60s
#
# # List of genesis transactions
# transactions = [
# {recipient = "BASE58ADDRESS1", amount = 50000000000000},
# {recipient = "BASE58ADDRESS2", amount = 50000000000000}
# ]
# }
# }
}
# Checkpoints settings.
checkpoints {
# The public key for checkpoints verification. The default value is the TESTNET public key.
public-key = "4PvoqxpWi7kCA9N3UXcEB9CZx4iPPeHX9jSYdAioPhnr"
}
fees {
}
issue {
WAVES = 100000000
}
transfer {
WAVES = 100000
}
reissue {
WAVES = 100000
}
burn {
WAVES = 100000
}
exchange {
WAVES = 100000
}
lease {
WAVES = 100000
}
lease-cancel {
WAVES = 100000
}
create-alias {
WAVES = 100000
}
}
# Matcher settings.
matcher {
# Enable/disable matcher.
enable = yes
# Matcher's account address.
account = ""
# Matcher REST API bind address.
bind-address = "127.0.0.1"
# Matcher REST API port.
port = 6886
# Minimum allowed order fee.
min-order-fee = 100000
# A fee of order match transaction.
order-match-tx-fee = 100000
# Matcher's directories.
journal-directory = ${waves.directory}"/journal"
snapshots-directory = ${waves.directory}"/snapshots"
# Snapshot creation interval.
snapshots-interval = 1d
# A maximum number of open orders.
max-open-orders = 1000
price-assets: []
# Predefined ordering of base assets.
predefined-pairs: []
}
# New block generator settings.
miner {
# Enable/disable block generation.
enable = yes
# Enable/disable off-line block generation.
offline = no
# The number of connected peers required to start block generation.
quorum = 1
# New block generation interval.
generation-delay = 15s
# The maximum age of the last block to allow generation.
interval-after-last-block-then-generation-is-allowed = 1d
# Enable/disable TF-Like scheduling.
tf-like-scheduling = yes
}
# Node's REST API settings.
rest-api {
# Enable/disable REST API.
enable = yes
# Network address to bind.
bind-address = "127.0.0.1"
# Port to listen to REST API requests.
port = 6869
# Hash of API key string.
api-key-hash = "H6nsiifwYKYEx6YzYD7woP1XCn72RVvx6tC1zjjLXqsu"
# Enable/disable CORS support.
cors = yes
}
# Nodes' synchronisation settings.
synchronization {
# The number of blocks that could be rolled back in case of a fork detection. If the fork is longer than this the rollback is impossible.
max-rollback = 100
# The size of temporary storage for forked blocks.
max-chain-length = 101
# Load only entire chain from peer then requested.
load-entire-chain = yes
# Timeout to receive all requested blocks.
synchronization-timeout = 30s
# Stick to one peer while receiving requested blocks.
pin-to-initial-peer = yes
# The number of retries of synchronisation before sending the peer to the blacklist.
retries-before-blacklisting = 2
# The number of retries of synchronisation operations.
operation-retires = 3
# Score broadcast interval.
score-broadcast-interval = 30s
# Time to live for broadcasted score.
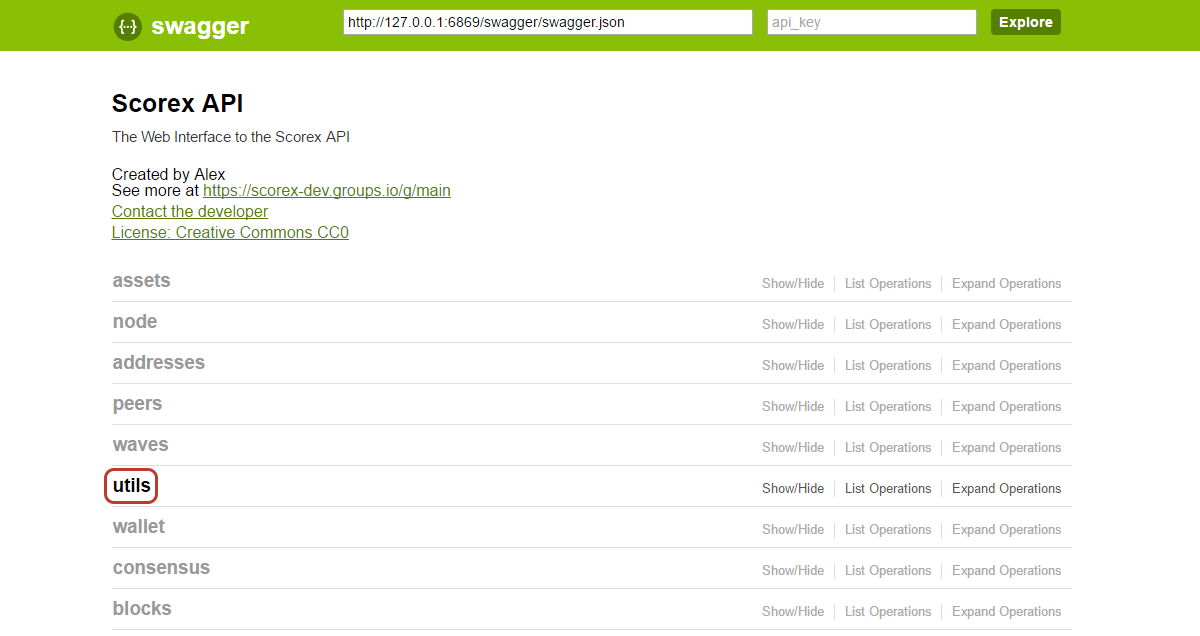
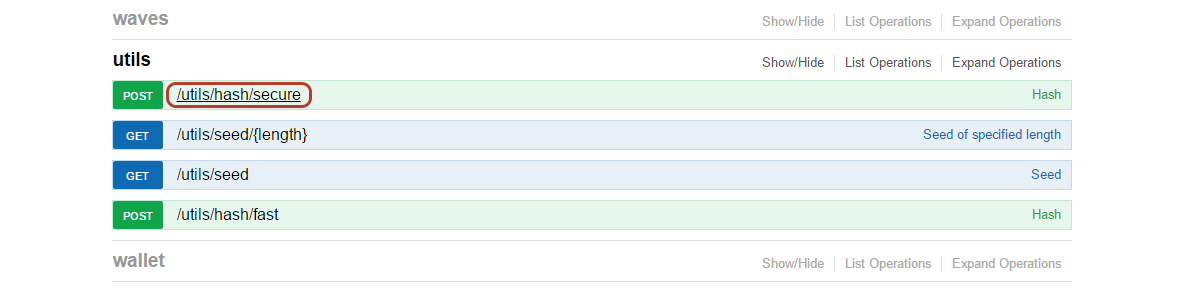
It is also very important that you encrypt your apikey on api-key-hash = "". To do so, simply run Waves with the default bind-address = "127.0.0.1" and with enable = yes, in Node's REST API settings. This ensures that you can connect to the network safely and encrypt your apikey
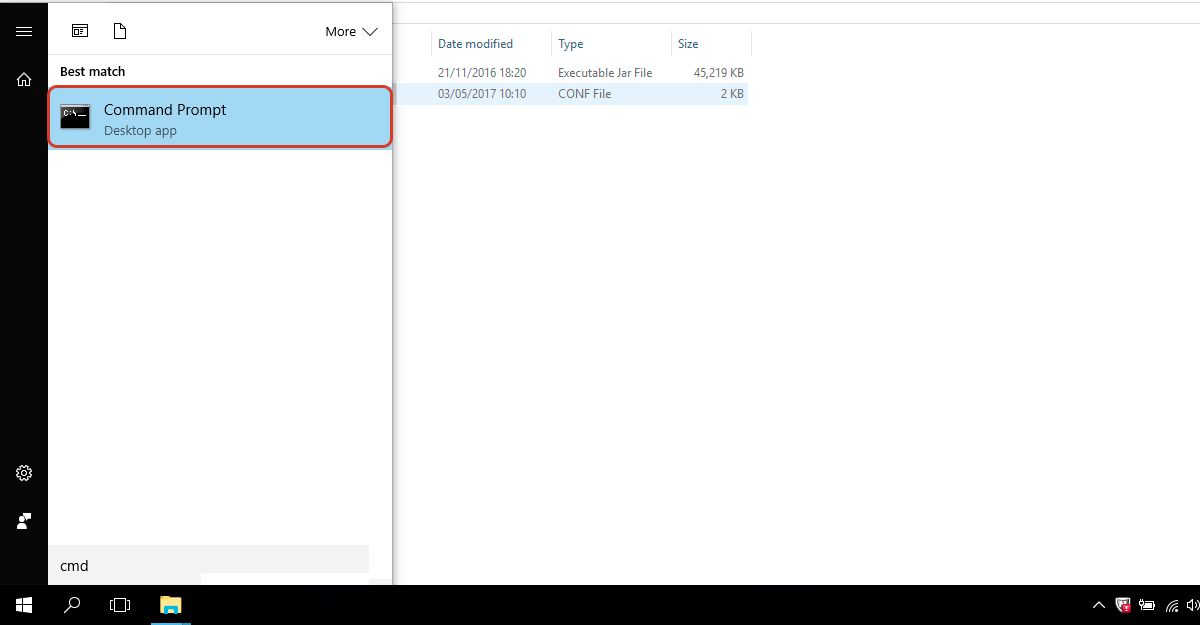
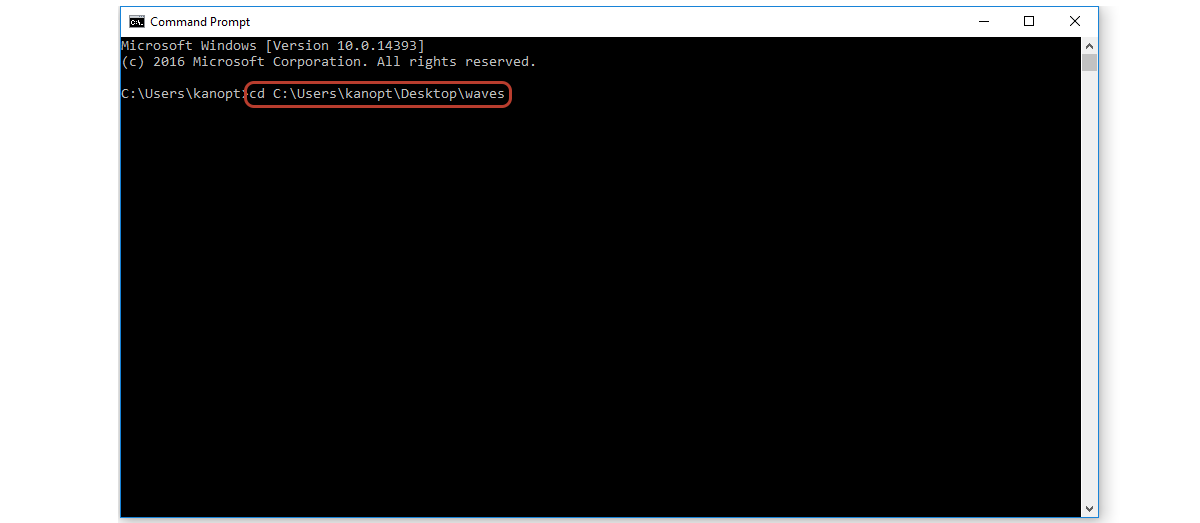
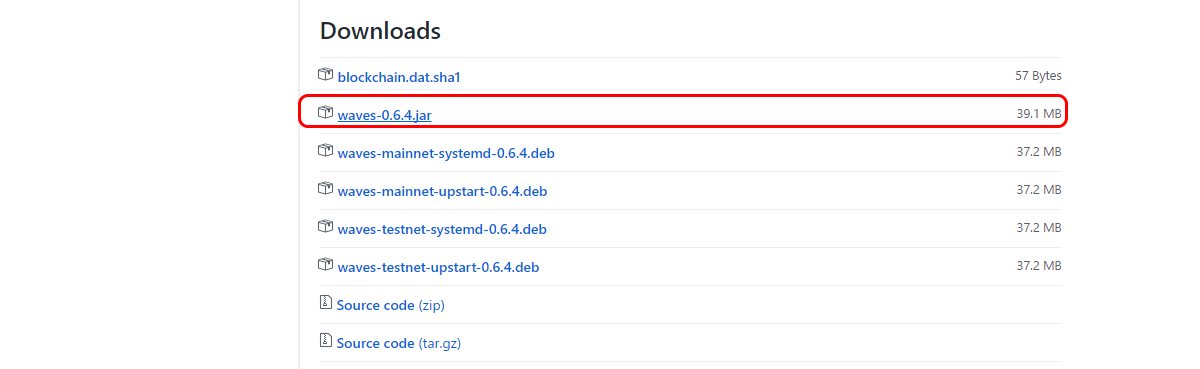
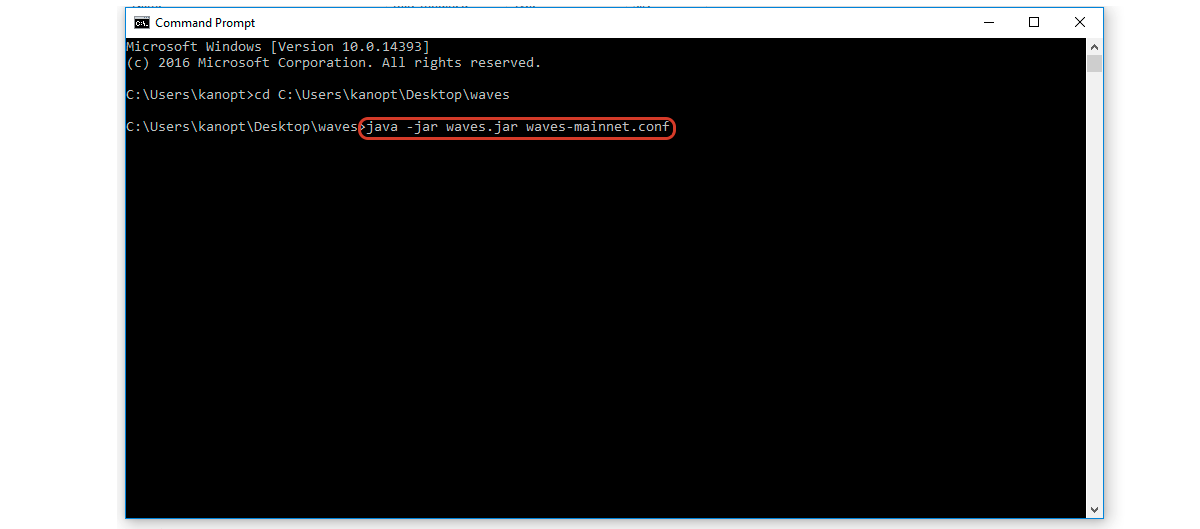
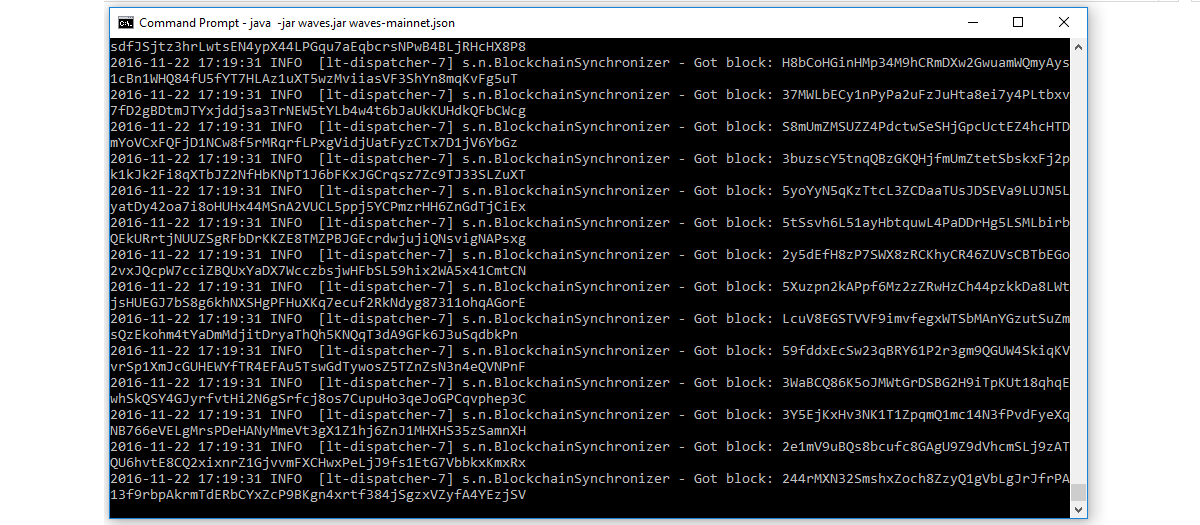
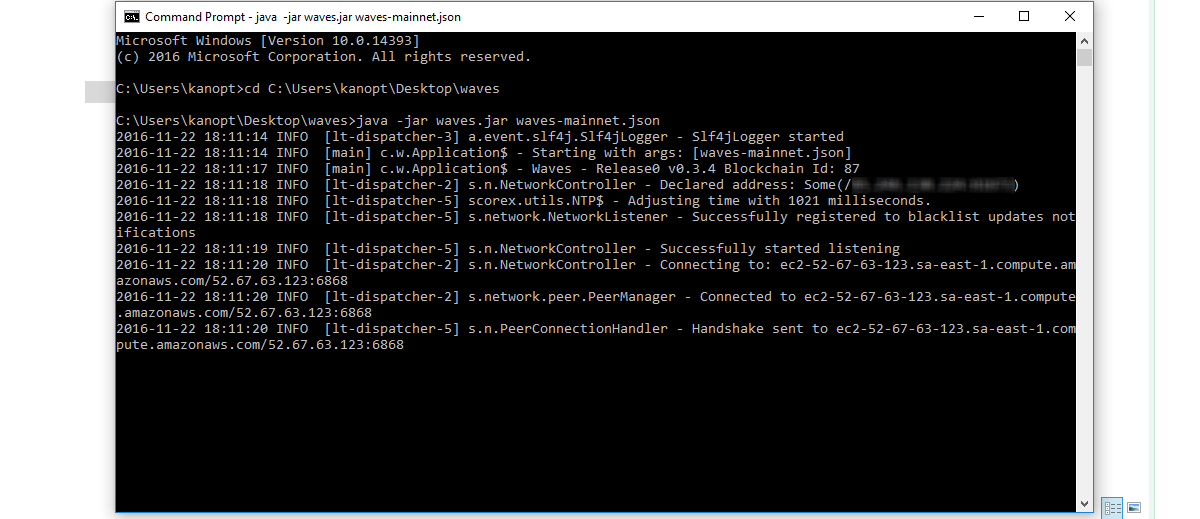
Step 3: Now enter the command "java -jar waves.jar waves-mainnet.conf" to run Waves with the config you specifie


&p[summary]= Waves is a decentralized crypto platform, based on an improved authenticated dynamic dictionaries scalability approach being built on ...&p[url]=http://icoind.blogspot.com/2017/11/how-to-mine-waves-windows.html&p[images][0]=https://blogger.googleusercontent.com/img/b/R29vZ2xl/AVvXsEjLoFfG1gK00_ZMWYWInfs-ezmu80cWygukIcU8ZKw_P9uPCahIU0EXtMypvJa6cyGANcap0OvchO4RqpXVPsMlfea9GMgm7Gm4BqPfTslf3Foet64_N4wZ-B-I8oMB6TwiSSqbMVhIM_h2/s640/headercryptocompare.png)
Waves is a decentralized crypto platform, based on an improved authenticated dynamic dictionaries scalability approach being built on top of the Scorex framework.
ReplyDeleteneo web wallet
These developments have the potential to allow people to invest in the crypto currency space without owning CC's outright, or using the services of a CC exchange. Getnode Test
ReplyDelete